apache web server
(Written by Paul Cobbaut, https://github.com/paulcobbaut/, with contributions by: Hans Roes, https://github.com/Blokker-1999/, Alex M. Schapelle, https://github.com/zero-pytagoras/, Bert Van Vreckem, https://github.com/bertvv/)
In this chapter, we learn how to setup an Apache web server.
The origins of Apache can be traced back to 1995, when the National Center for Supercomputing Applications (NCSA) released the first version of the NCSA httpd web server. Being open source, people started to contribute improvements and changes to the code, also called patches. That's what lead to the name: a patchy web server, or Apache.
Apache is a key component of the LAMP stack, consisting of Linux, Apache, MySQL, and Perl/PHP/Python. The LAMP stack is a widely used platform for web development and lies at the base of the web 2.0 revolution.
Between about 1996 and 2016, Apache was market leader in web servers. In its peak period around 2005, about 70% of all web servers were running on Apache (see https://www.netcraft.com/blog/july-2026-web-server-survey).
These days, Apache has had to cede its leading position to Nginx and Cloudflare, but it is still widely used and supported.
introduction to Apache
installing on Debian
The transcript below shows that there is no apache server installed, nor
does the /var/www directory exist.
student@debian:~$ ls -l /var/www
ls: cannot access '/var/www': No such file or directory
student@debian:~$ dpkg -l apache2
dpkg-query: no packages found matching apache2
To install apache on Debian:
student@debian:~$ sudo apt install apache2
Installing:
  apache2

Installing dependencies:
  apache2-bin   apache2-utils  libaprutil1-dbd-sqlite3  libaprutil1t64  ssl-cert
  apache2-data  libapr1t64     libaprutil1-ldap         liblua5.4-0

Suggested packages:
  apache2-doc  apache2-suexec-pristine  | apache2-suexec-custom  ufw  www-browser

Summary:
  Upgrading: 0, Installing: 10, Removing: 0, Not Upgrading: 87
  Download size: 2,405 kB
  Space needed: 8,568 kB / 58.7 GB available

Continue? [Y/n] y
Get:1 http://httpredir.debian.org/debian trixie/main amd64 libapr1t64 amd64 1.7.5-1 [104 kB]
[... output omitted ...]
Enabling conf serve-cgi-bin.
Enabling site 000-default.
Created symlink '/etc/systemd/system/multi-user.target.wants/apache2.service' → '/usr/lib/systemd/system/apache2.service'.
Created symlink '/etc/systemd/system/multi-user.target.wants/apache-htcacheclean.service' → '/usr/lib/systemd/system/apache-htcacheclean.service'.
Processing triggers for man-db (2.13.1-1) ...
Processing triggers for libc-bin (2.41-12) ...
After installation, the same two commands as above will yield a different result:
student@debian:~$ ls -l /var/www
total 4
drwxr-xr-x 2 root root 4096 Aug 10 14:39 html
student@debian:~$ dpkg -l apache2
Desired=Unknown/Install/Remove/Purge/Hold
| Status=Not/Inst/Conf-files/Unpacked/halF-conf/Half-inst/trig-aWait/Trig-pend
|/ Err?=(none)/Reinst-required (Status,Err: uppercase=bad)
||/ Name           Version          Architecture Description
+++-==============-================-============-=================================
ii  apache2        2.4.68-1~deb13u1 amd64        Apache HTTP Server
installing on Enterprise Linux
Note that Red Hat derived distributions use httpd as package and process name instead of apache2.
To verify whether Apache is installed in Enterprise Linux:
student@el:~$ ls -l /var/www
ls: cannot access '/var/www': No such file or directory
student@el:~$ rpm -q httpd
package httpd is not installed
To install Apache on Enterprise Linux:
student@el:~$ sudo dnf install httpd
Last metadata expiration check: 0:15:30 ago on Mon 10 Aug 2026 02:30:24 PM UTC.
Dependencies resolved.
====================================================================================================================
 Package                           Architecture       Version                           Repository             Size
====================================================================================================================
Installing:
 httpd                             x86_64             2.4.63-13.el10_2.5                appstream              48 k
Installing dependencies:
 almalinux-logos-httpd             noarch             100.4-1.el10_2                    appstream              18 k
 apr                               x86_64             1.7.5-3.el10                      appstream             127 k
 apr-util                          x86_64             1.6.3-23.el10_1                   appstream              97 k
 apr-util-lmdb                     x86_64             1.6.3-23.el10_1                   appstream              13 k
 httpd-core                        x86_64             2.4.63-13.el10_2.5                appstream             1.4 M
 httpd-filesystem                  noarch             2.4.63-13.el10_2.5                appstream              14 k
 httpd-tools                       x86_64             2.4.63-13.el10_2.5                appstream              81 k
Installing weak dependencies:
 apr-util-openssl                  x86_64             1.6.3-23.el10_1                   appstream              15 k
 mod_http2                         x86_64             2.0.29-4.el10_2.2                 appstream             161 k
 mod_lua                           x86_64             2.4.63-13.el10_2.5                appstream              59 k

Transaction Summary
====================================================================================================================
Install  11 Packages

Total download size: 2.0 M
Installed size: 6.0 M
Is this ok [y/N]: y
Downloading Packages:
(1/11): apr-util-1.6.3-23.el10_1.x86_64.rpm                                         625 kB/s |  97 kB     00:00
[... output omitted ...]
Installed:
  almalinux-logos-httpd-100.4-1.el10_2.noarch               apr-1.7.5-3.el10.x86_64
  apr-util-1.6.3-23.el10_1.x86_64                           apr-util-lmdb-1.6.3-23.el10_1.x86_64
  apr-util-openssl-1.6.3-23.el10_1.x86_64                   httpd-2.4.63-13.el10_2.5.x86_64
  httpd-core-2.4.63-13.el10_2.5.x86_64                      httpd-filesystem-2.4.63-13.el10_2.5.noarch
  httpd-tools-2.4.63-13.el10_2.5.x86_64                     mod_http2-2.0.29-4.el10_2.2.x86_64
  mod_lua-2.4.63-13.el10_2.5.x86_64

Complete!
After running the dnf install httpd command, Apache is installed and the /var/www directory exists.
student@el:~$ ls -l /var/www
total 0
drwxr-xr-x. 2 root root 6 Jul  9 00:00 cgi-bin
drwxr-xr-x. 2 root root 6 Jul  9 00:00 html
student@el:~$ rpm -q httpd
httpd-2.4.63-13.el10_2.5.x86_64
running Apache on Debian
On Debian, the Apache service will also have been started automatically after installation. You can verify this with the systemctl status apache2.service command:
student@debian:~$ systemctl status apache2.service
● apache2.service - The Apache HTTP Server
     Loaded: loaded (/usr/lib/systemd/system/apache2.service; enabled; preset: enabled)
     Active: active (running) since Mon 2026-08-10 14:39:59 UTC; 2min 59s ago
 Invocation: 364ecb43cebc4fb58e929a771ef6900b
       Docs: https://httpd.apache.org/docs/2.4/
   Main PID: 3252 (apache2)
      Tasks: 55 (limit: 3506)
     Memory: 5.3M (peak: 5.7M)
        CPU: 23ms
     CGroup: /system.slice/apache2.service
             ├─3252 /usr/sbin/apache2 -k start
             ├─3254 /usr/sbin/apache2 -k start
             └─3255 /usr/sbin/apache2 -k start
Remark that the service is also enabled, so it will start automatically after a reboot.
If the service is running, you can check if it is serving web pages using e.g. curl:
student@debian:~$ curl -i http://localhost/
HTTP/1.1 200 OK
Date: Mon, 10 Aug 2026 14:52:05 GMT
Server: Apache/2.4.68 (Debian)
Last-Modified: Mon, 10 Aug 2026 14:39:58 GMT
ETag: "29cf-658b25412c753"
Accept-Ranges: bytes
Content-Length: 10703
Vary: Accept-Encoding
Content-Type: text/html

<!DOCTYPE html PUBLIC "-//W3C//DTD XHTML 1.0 Transitional//EN" "http://www.w3.org/TR/xhtml1/DTD/xhtml1-transitional.dtd">
<html xmlns="http://www.w3.org/1999/xhtml">
  <head>
    <meta http-equiv="Content-Type" content="text/html; charset=UTF-8" />
    <title>Apache2 Debian Default Page: It works</title>
[... output omitted ...]
Debian provides a default web page in /var/www/index.html that is served when you browse to the ip-address of your server.
You can also verify that Apache is running by opening a web browser, and browse to the ip-address of your server (this is left as an exercise). An Apache test page should be shown.
running Apache on Enterprise Linux
Remark that on Enterprise Linux, the httpd service is not started automatically after installation. You can verify this with the systemctl status httpd.service command:
student@el:~$ systemctl status httpd
○ httpd.service - The Apache HTTP Server
     Loaded: loaded (/usr/lib/systemd/system/httpd.service; disabled; preset: disabled)
     Active: inactive (dead)
       Docs: man:httpd.service(8)
To start and enable the httpd service, use the following command (and then verify with systemctl status httpd):
student@el:~$ sudo systemctl enable --now httpd
Created symlink '/etc/systemd/system/multi-user.target.wants/httpd.service' → '/usr/lib/systemd/system/httpd.service'.
student@el:~$ systemctl status httpd
● httpd.service - The Apache HTTP Server
     Loaded: loaded (/usr/lib/systemd/system/httpd.service; enabled; preset: disabled)
     Active: active (running) since Mon 2026-08-10 14:59:32 UTC; 3s ago
 Invocation: 3ffd69f238814e7faadad51b3e07d112
       Docs: man:httpd.service(8)
   Main PID: 7818 (httpd)
     Status: "Started, listening on: port 80"
      Tasks: 177 (limit: 18320)
     Memory: 13.9M (peak: 14.2M)
        CPU: 37ms
     CGroup: /system.slice/httpd.service
             ├─7818 /usr/sbin/httpd -DFOREGROUND
             ├─7820 /usr/sbin/httpd -DFOREGROUND
             ├─7821 /usr/sbin/httpd -DFOREGROUND
             ├─7822 /usr/sbin/httpd -DFOREGROUND
             └─7858 /usr/sbin/httpd -DFOREGROUND

Aug 10 14:59:32 el systemd[1]: Starting httpd.service - The Apache HTTP Server...
Aug 10 14:59:32 el (httpd)[7818]: httpd.service: Referenced but unset environment variable evaluates to an empty st>
Aug 10 14:59:32 el httpd[7818]: AH00558: httpd: Could not reliably determine the server's fully qualified domain na>
Aug 10 14:59:32 el httpd[7818]: Server configured, listening on: port 80
Aug 10 14:59:32 el systemd[1]: Started httpd.service - The Apache HTTP Server.
You can again use curl to verify that Apache is serving web pages:
student@el:~$ curl -i http://localhost/
HTTP/1.1 403 Forbidden
Date: Mon, 10 Aug 2026 15:01:06 GMT
Server: Apache/2.4.63 (AlmaLinux)
Last-Modified: Thu, 28 Nov 2024 18:02:45 GMT
ETag: "1680-627fce3a8db40"
Accept-Ranges: bytes
Content-Length: 5760
Content-Type: text/html; charset=UTF-8

<!DOCTYPE html PUBLIC "-//W3C//DTD XHTML 1.1//EN" "http://www.w3.org/TR/xhtml11/DTD/xhtml11.dtd">

<html xmlns="http://www.w3.org/1999/xhtml" xml:lang="en">
        <head>
                <title>Test Page for the HTTP Server on AlmaLinux</title>
[... output omitted ...]
In a browser, you will see a test page, just like on Debian. But do you notice the difference in behaviour between Debian and Enterprise Linux? Take a look at the HTTP response headers. On Debian, the response code is 200 OK, while on Enterprise Linux it is 403 Forbidden. This is because Enterprise Linux does not provide a default index.html file, while Debian does.
Although the same Apache is running on both Debian and Enterprise Linux, there are considerable differences between the two distributions in the way you configure and manage Apache.
index file on Enterprise Linux
Enterprise Linux does not provide a standard index.html or index.php file, which results in the 403 Forbidden error shown above.
If you create a custom index.html file in /var/www/html it will immediately serve as an index for this web server.
student@el:~$ echo '<html><body><h1>It works!</h1></body></html>' | sudo tee /var/www/html/index.html
<html><body><h1>It works!</h1></body></html>
student@el:~$ curl -i http://127.0.0.1/
HTTP/1.1 200 OK
Date: Mon, 10 Aug 2026 15:14:37 GMT
Server: Apache/2.4.63 (AlmaLinux)
Last-Modified: Mon, 10 Aug 2026 15:14:24 GMT
ETag: "2d-658b2cf420fd7"
Accept-Ranges: bytes
Content-Length: 45
Content-Type: text/html; charset=UTF-8

<html><body><h1>It works!</h1></body></html>
default website
Changing the default website of a freshly installed Apache web server is easy. All you need to do is create (or change) an index.html file in the DocumentRoot directory.
To locate the DocumentRoot directory on Debian:
student@debian:~$ grep DocumentRoot /etc/apache2/sites-available/000-default.conf
        DocumentRoot /var/www/html
This means that /var/www/html is the directory that contains the default web site.
Use curl to download the index page and compare it with the index.html file in /var/www/html. They should be exactly the same!
student@debian:~$ curl -s http://127.0.0.1/ > index.html
student@debian:~$ diff index.html /var/www/html/index.html
Diff does not return any output, which means that the two files are identical.
This transcript shows how to locate the DocumentRoot directory on Enterprise Linux.
After installation, this directory is empty, but now it will contain the index.html file that we created above.
Apache configuration
There are many similarities, but also a couple of differences when configuring apache on Debian or on Enterprise Linux. Both Linux families will get their own sections with examples.
All configuration on Debian and derived distributions is done in /etc/apache2.
student@debian:~$ ls -l /etc/apache2/
total 80
-rw-r--r-- 1 root root  7178 Aug 10 14:55 apache2.conf
drwxr-xr-x 2 root root  4096 Aug 10 14:39 conf-available
drwxr-xr-x 2 root root  4096 Aug 10 14:39 conf-enabled
-rw-r--r-- 1 root root  1782 Jun 11 18:28 envvars
-rw-r--r-- 1 root root 31063 Dec  5  2025 magic
drwxr-xr-x 2 root root 12288 Aug 10 14:39 mods-available
drwxr-xr-x 2 root root  4096 Aug 10 14:39 mods-enabled
-rw-r--r-- 1 root root   274 Jun 11 18:28 ports.conf
drwxr-xr-x 2 root root  4096 Aug 10 14:39 sites-available
drwxr-xr-x 2 root root  4096 Aug 10 14:39 sites-enabled
Enterprise Linux uses /etc/httpd.
student@el:~$ ls -l /etc/httpd/
total 4
drwxr-xr-x. 2 root root   37 Aug 10 14:46 conf
drwxr-xr-x. 2 root root   82 Aug 10 14:46 conf.d
drwxr-xr-x. 2 root root 4096 Aug 10 14:46 conf.modules.d
lrwxrwxrwx. 1 root root   19 Jul  9 00:00 logs -> ../../var/log/httpd
lrwxrwxrwx. 1 root root   29 Jul  9 00:00 modules -> ../../usr/lib64/httpd/modules
lrwxrwxrwx. 1 root root   10 Jul  9 00:00 run -> /run/httpd
lrwxrwxrwx. 1 root root   19 Jul  9 00:00 state -> ../../var/lib/httpd
Those are quite different, indeed!
The main configuration file on Debian is /etc/apache2/apache2.conf, while on Enterprise Linux it is /etc/httpd/conf/httpd.conf.
On Debian, additional configuration files are stored in /etc/apache2/conf-available and /etc/apache2/mods-available and /etc/apache2/sites-available. In order to actually load the settings in these files on service startup, you need to enable them with the a2enconf, a2enmod or a2ensite commands. The effect of these commands are that a link is created from the file in one of the -available directories to the corresponding -enabled directory that will actually be loaded. There are also a2disconf, a2dismod and a2dissite commands to disable configuration files that remove these links.
Enterprise Linux does not have the -available and -enabled directories, nor the a2* commands. All files ending in .conf that are located in /etc/httpd/conf.modules.d and /etc/httpd/conf.d are loaded on service startup.
It is wise to make a backup of the configuration files before making changes. You can use the cp command to make a copy of the configuration file.
Before reloading the service with a changed settings, it is also a good idea to check the syntax of the configuration files with the command apachectl configtest.
student@debian:~$ sudo apachectl configtest
AH00558: apache2: Could not reliably determine the server's fully qualified domain name, using 127.0.1.1. Set the 'ServerName' directive globally to suppress this message
Syntax OK
To avoid this message, you can set the ServerName directive in /etc/apache2/apache2.conf (or /etc/httpd/conf/httpd.conf on Enterprise Linux) to the hostname of your server. If your system does not have a hostname that resolves to an IP address, you can use localhost as the ServerName, or an entry from /etc/hosts that resolves to the ip-address of your server.
student@debian:~$ grep debian /etc/hosts
127.0.1.1       debian     debian.localdomain
student@debian:~$ echo 'ServerName debian.localdomain' | sudo tee -a /etc/apache2/apache2.conf
student@debian:~$ tail -1 /etc/apache2/apache2.conf
ServerName debian.localdomain
student@debian:~$ sudo apache2ctl configtest
Syntax OK
student@debian:~$ sudo systemctl restart apache2
port virtual hosts on Debian
Virtual hosts are the mechanism that allows you to run multiple websites on one web server. Each website can be on a different port, or on the same port but with a different hostname. Client requests are routed to the correct web server (and port) through e.g. a reverse proxy and/or several DNS records pointing to the same ip-address.
default virtual host (Debian)
Debian has a virtualhost configuration file for its default website in
/etc/apache2/sites-available/default.
This configuration handles all HTTP requests on port 80, regardless of the server hostname the request was directed to. The DocumentRoot directive in the configuration file determines the directory that is served for this virtual host.
student@debian:~$ grep DocumentRoot /etc/apache2/sites-available/000-default.conf
        DocumentRoot /var/www/html
three extra virtual hosts (Debian)
In this scenario we create three additional websites for three customers
that share a clubhouse and want to jointly hire you as their webmaster. They are a model train club named Choo Choo, a chess club named Chess Club 42 and a hackerspace named hunter2.
One way to put three websites on one web server, is to put each website on a different port. This example shows three newly created virtual hosts, one for each customer.
student@debian:~$ cd /etc/apache2/sites-available/
student@debian:/etc/apache2/sites-available$ sudo nano choochoo.conf
student@debian:/etc/apache2/sites-available$ sudo nano chessclub42.conf
student@debian:/etc/apache2/sites-available$ sudo nano hunter2.conf
student@debian:/etc/apache2/sites-available$ cat choochoo.conf
<VirtualHost *:7000>
        ServerAdmin webmaster@localhost
        DocumentRoot /var/www/choochoo
</VirtualHost>
student@debian:/etc/apache2/sites-available$ cat chessclub42.conf
<VirtualHost *:8000>
        ServerAdmin webmaster@localhost
        DocumentRoot /var/www/chessclub42
</VirtualHost>
student@debian:/etc/apache2/sites-available$ cat hunter2.conf
<VirtualHost *:9000>
        ServerAdmin webmaster@localhost
        DocumentRoot /var/www/hunter2
</VirtualHost>
Notice the different port numbers 7000, 8000 and 9000. Notice also that we specified a unique DocumentRoot for each website.
three extra websites (Debian)
Next we need to create three DocumentRoot directories.
student@debian:~$ sudo mkdir /var/www/{choochoo,chessclub42,hunter2}
student@debian:~$ ls -l /var/www
total 16
drwxr-xr-x 2 root root 4096 Aug 11 11:52 chessclub42
drwxr-xr-x 2 root root 4096 Aug 11 11:52 choochoo
drwxr-xr-x 2 root root 4096 Aug 10 14:39 html
drwxr-xr-x 2 root root 4096 Aug 11 11:52 hunter2
And we have to put some content in those directories.
student@debian:~$ echo 'Choo Choo model train Choo Choo' | sudo tee /var/www/choochoo/index.html
Choo Choo model train Choo Choo
student@debian:~$ echo 'Welcome to chess club 42' | sudo tee /var/www/chessclub42/index.html
Welcome to chess club 42
student@debian:~$ echo 'HaCkInG iS fUn At HuNtEr2' | sudo tee /var/www/hunter2/index.html
HaCkInG iS fUn At HuNtEr2
three extra ports (Debian)
We need to enable these three ports on Apache in the ports.conf file. Open this file with a text editor and add three lines starting with the Listen directive specifying the three extra ports.
student@debian:~$ sudo nano /etc/apache2/ports.conf
student@debian:~$ grep ^Listen /etc/apache2/ports.conf
Listen 80
Listen 7000
Listen 8000
Listen 9000
enabling extra websites (Debian)
The last step is to enable the websites with the a2ensite command. This command will create links in sites-enabled.
The links are not there yet...
student@debian:~$ cd /etc/apache2/
student@debian:/etc/apache2$ ls sites-available/
000-default.conf  chessclub42.conf  choochoo.conf  default-ssl.conf  hunter2.conf
student@debian:/etc/apache2$ ls sites-enabled/
000-default.conf
So we run the a2ensite command for all websites.
student@debian:/etc/apache2$ sudo a2ensite choochoo chessclub42 hunter2
Enabling site choochoo.
Enabling site chessclub42.
Enabling site hunter2.
To activate the new configuration, you need to run:
  systemctl reload apache2
student@debian:/etc/apache2$ ls -l sites-enabled/
total 0
lrwxrwxrwx 1 root root 35 Aug 10 14:39 000-default.conf -> ../sites-available/000-default.conf
lrwxrwxrwx 1 root root 35 Aug 11 11:58 chessclub42.conf -> ../sites-available/chessclub42.conf
lrwxrwxrwx 1 root root 32 Aug 11 11:58 choochoo.conf -> ../sites-available/choochoo.conf
lrwxrwxrwx 1 root root 31 Aug 11 11:58 hunter2.conf -> ../sites-available/hunter2.conf
The links are created, so we can tell apache to restart.
This command should not return any output, which means that the apache service has been reloaded successfully.
testing the three websites (Debian)
To chech whether Apache is listening on the three additional ports, you can use the command ss -tln:
vagrant@debian:~$ ss -tln
State    Recv-Q  Send-Q  Local Address:Port  Peer Address:Port
LISTEN   0       4096          0.0.0.0:111        0.0.0.0:*
LISTEN   0       128           0.0.0.0:22         0.0.0.0:*
LISTEN   0       4096             [::]:111           [::]:*
LISTEN   0       511                 *:80               *:*
LISTEN   0       128              [::]:22            [::]:*
LISTEN   0       511                 *:7000             *:*
LISTEN   0       511                 *:9000             *:*
LISTEN   0       511                 *:8000             *:*
To be sure that apache2 (an not another process) is listening on ports 7000, 8000 and 9000, add option -p to the command and precede it with sudo to see the process name and PID. The output is too verbose to show it here.
Testing the several websites can be done with curl or wget. The following transcript shows the output of three curl commands, each sending a request to the three configured ports. The output is the content of the index.html file in the DocumentRoot of each website.
student@debian:/etc/apache2$ curl http://localhost:7000/
Choo Choo model train Choo Choo
student@debian:/etc/apache2$ curl http://localhost:8000/
Welcome to chess club 42!
student@debian:/etc/apache2$ curl http://localhost:9000/
HaCkInG iS fUn At HuNtEr2
Try testing from another computer using the ip-address of your server!
named virtual hosts on Debian
For an external customer, having to access a website through a port number is not very user friendly. It is much better to have a website accessible by name, e.g. mysite.example.com instead of www.example.com:8000. This is possible with named virtual hosts.
The chess club and the model train club would prefer to have their website accessible by name.
We continue work on the same server that has three websites on three ports. We need to make sure those websites are accesible using the names choochoo.local, chessclub42.local and hunter2.local.
We start by creating three new virtualhosts.
student@debian:/etc/apache2/sites-available$ sudo nano choochoo.local.conf
student@debian:/etc/apache2/sites-available$ sudo nano chessclub42.local.conf
student@debian:/etc/apache2/sites-available$ sudo nano hunter2.local.conf
student@debian:/etc/apache2/sites-available$ cat *.local.conf
<VirtualHost *:80>
        ServerAdmin webmaster@localhost
        ServerName chessclub42.local
        DocumentRoot /var/www/chessclub42
</VirtualHost>
<VirtualHost *:80>
        ServerAdmin webmaster@localhost
        ServerName choochoo.local
        DocumentRoot /var/www/choochoo
</VirtualHost>
<VirtualHost *:80>
        ServerAdmin webmaster@localhost
        ServerName hunter2.local
        DocumentRoot /var/www/hunter2
</VirtualHost>
Notice that they all listen on port 80 and have an extra ServerName directive.
name resolution (Debian)
In order for a client to access a website by name, the name must be resolved to an ip-address. This is usually done with DNS. For this demo it is also possible to quickly add the three names to the /etc/hosts file.
In this example, we will first check our ip address and then add the three names to /etc/hosts. If you want to reproduce the example, be sure to replace the ip address with your own!
student@debian:~$ ip -br a
lo               UNKNOWN        127.0.0.1/8 ::1/128
eth0             UP             10.0.2.15/24 fe80::e845:83b0:bc1:ed0d/64
eth1             UP             192.168.56.13/24 fe80::a00:27ff:fe09:b99/64
student@debian:~$ sudo nano /etc/hosts
student@debian:~$ grep ^192 /etc/hosts
192.168.56.13  debian.local  choochoo.local  chessclub42.local  hunter2.local
You can check if the names are resolved correctly with the getent ahosts command.
student@debian:~$ getent ahosts debian.local
192.168.56.13   STREAM debian.local
192.168.56.13   DGRAM
192.168.56.13   RAW
student@debian:~$ getent ahosts choochoo.local
192.168.56.13   STREAM choochoo.local
192.168.56.13   DGRAM
192.168.56.13   RAW
student@debian:~$ getent ahosts chessclub42.local
192.168.56.13   STREAM chessclub42.local
192.168.56.13   DGRAM
192.168.56.13   RAW
student@debian:~$ getent ahosts hunter2.local
192.168.56.13   STREAM hunter2.local
192.168.56.13   DGRAM
192.168.56.13   RAW
Remark that you could also use ping, but actually sending packets is not necessary to verify name resolution. The nslookup command will probably not work (if it is installed at all), beause it will try to query a DNS server, which is not configured for these names.
enabling virtual hosts
Next we enable them with a2ensite.
student@debian:/etc/apache2/sites-available$ sudo a2ensite choochoo.local chessclub42.local hunter2.local
Enabling site choochoo.local.
Enabling site chessclub42.local.
Enabling site hunter2.local.
To activate the new configuration, you need to run:
  systemctl reload apache2
reload and verify (Debian)
After a systemctl reload apache2 the websites should be available by name.
student@debian:~$ sudo systemctl reload apache2.service
student@debian:~$ curl http://debian.local/

<!DOCTYPE html PUBLIC "-//W3C//DTD XHTML 1.0 Transitional//EN" "http://www.w3.org/TR/xhtml1/DTD/xhtml1-transitional.dtd">
<html xmlns="http://www.w3.org/1999/xhtml">
  <head>
    <meta http-equiv="Content-Type" content="text/html; charset=UTF-8" />
    <title>Apache2 Debian Default Page: It works</title>
[... output omitted ...]
student@debian:~$ curl http://choochoo.local/
Choo Choo model train Choo Choo
student@debian:~$ curl http://chessclub42.local/
Welcome to chess club 42!
student@debian:~$ curl http://hunter2.local/
HaCkInG iS fUn At HuNtEr2
password protected website on Debian
You can secure files and directories in your website with a .htaccess file that refers to a .htpasswd file. The htpasswd command can create a .htpasswd file that contains a userid and an (encrypted) password.
This example creates a user and password for the hacker named cliff and uses the -c flag to create the .htpasswd file.
student@debian:~$ sudo htpasswd -c /var/www/.htpasswd cliff
New password:
Re-type new password:
Adding password for user cliff
Hacker rob also wants access, so we add a second user and password to .htpasswd (this time without the -c flag!).
student@debian:~$ sudo htpasswd /var/www/.htpasswd rob
New password:
Re-type new password:
Adding password for user rob
student@debian:~$ cat /var/www/.htpasswd
cliff:$apr1$bAUQisSY$KTgmdtjTamFUdP.CsjDkP0
rob:$apr1$TyUD.92A$Nfr9YBbG4Vcasew97S6QZ1
Both Cliff and Rob chose the same password (hunter2), but that is not visible in the .htpasswd file because of the different salts.
Next we need to create a .htaccess file in the DocumentRoot of the website we want to protect. An example is shown here:
student@debian:~$ cd /var/www/hunter2/
student@debian:/var/www/hunter2$ sudo nano .htaccess
student@debian:/var/www/hunter2$ cat .htaccess
AuthUserFile /var/www/.htpasswd
AuthName "Members only!"
AuthType Basic
require valid-user
Note that we are only protecting the website of the hackerspace hunter2 that we created earlier.
And because we put this website in a subdirectory of the default website, we will need to adjust the AllowOverride parameter in the configuration. Open /etc/apache2/apache2.conf in a text editor and search for the line with <Directory /var/www/>. It will look like this:
<Directory /var/www/>
    Options Indexes FollowSymLinks
    AllowOverride None
    Require all granted
</Directory>
Change the code block to the following (Replace None with Authconfig):
<Directory /var/www/>
    Options Indexes FollowSymLinks
    AllowOverride Authconfig
    Require all granted
</Directory>
Now restart the apache2 server and test that it works!
student@debian:~$ sudo systemctl restart apache2.service
student@debian:~$ curl -i http://hunter2.local/
HTTP/1.1 401 Unauthorized
Date: Tue, 11 Aug 2026 13:00:16 GMT
Server: Apache/2.4.68 (Debian)
WWW-Authenticate: Basic realm="Members only!"
Content-Length: 498
Content-Type: text/html; charset=iso-8859-1

<!DOCTYPE HTML PUBLIC "-//W3C//DTD HTML 4.01//EN" "http://www.w3.org/TR/html4/strict.dtd">
<html><head>
<title>401 Unauthorized</title>
</head><body>
<h1>Unauthorized</h1>
<p>This server could not verify that you
are authorized to access the document
requested.  Either you supplied the wrong
credentials (e.g., bad password), or your
browser doesn't understand how to supply
the credentials required.</p>
<hr>
<address>Apache/2.4.68 (Debian) Server at localhost Port 9000</address>
</body></html>
As expected, the server returns a 401 Unauthorized error. You should get the same result for url http://localhost:9000/.
You can test the authentication with the -u option of curl.
student@debian:~$ curl -u cliff:hunter2 http://hunter2.local/
HaCkInG iS fUn At HuNtEr2
student@debian:~$ curl -u rob:hunter2 http://hunter2.local/
HaCkInG iS fUn At HuNtEr2
If you try to access the website from a web browser, you will see a pop-up window asking for a username and password. You can enter either cliff or rob as the username, and hunter2 as the password.
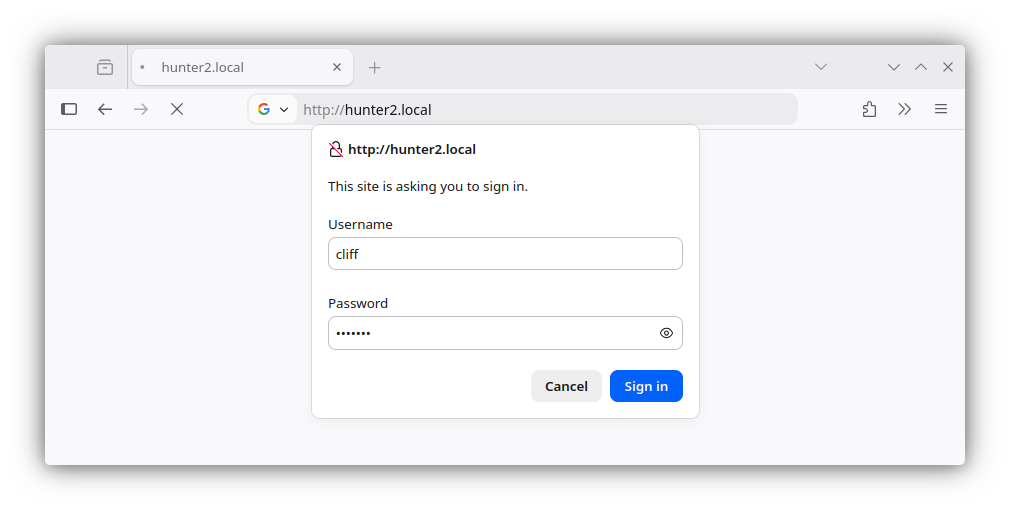
The other sites should still be accessible without authentication.
student@debian:~$ curl -I http://localhost/
HTTP/1.1 200 OK
Date: Wed, 12 Aug 2026 09:55:57 GMT
Server: Apache/2.4.68 (Debian)
Last-Modified: Wed, 12 Aug 2026 08:55:03 GMT
ETag: "29cf-658d5be3d1757"
Accept-Ranges: bytes
Content-Length: 10703
Vary: Accept-Encoding
Content-Type: text/html

student@debian:~$ curl http://choochoo.local/
Choo Choo model train Choo Choo
port virtual hosts on Enterprise Linux
The structure of the Apache configuration on Enterprise Linux is quite different from Debian. The main configuration file is /etc/httpd/conf/httpd.conf, and there is no sites-available or sites-enabled directory. Instead, all additional configuration files are placed in /etc/httpd/conf.d/.
default virtual host (EL)
Unlike Debian, Enterprise Linux has no virtualHost configuration file for its default website. Instead, the default configuration will throw a standard error page when no index file can be found in the default location (/var/www/html).
This is configured in /etc/httpd/conf.d/welcome.conf. Take a look at this file if you want to see how it works, but we will not discuss it here.
three extra virtual hosts (EL)
In this scenario we create three additional websites for three customers that share a clubhouse and want to jointly hire you. They are a model train club named Choo Choo, a chess club named Chess Club 42 and a hackerspace named hunter2.
One way to serve three websites on one web server, is to assign each website to a different port. This scenario shows three newly created virtual hosts, one for each customer.
student@el:~$ cd /etc/httpd/conf.d/
student@el:/etc/httpd/conf.d$ sudo vi choochoo.conf
student@el:/etc/httpd/conf.d$ sudo vi chessclub42.conf
student@el:/etc/httpd/conf.d$ sudo vi hunter2.conf
student@el:/etc/httpd/conf.d$ cat choochoo.conf chessclub42.conf hunter2.conf
<VirtualHost *:7000>
        ServerAdmin webmaster@localhost
        DocumentRoot /var/www/html/choochoo
</VirtualHost>
<VirtualHost *:8000>
        ServerAdmin webmaster@localhost
        DocumentRoot /var/www/html/chessclub42
</VirtualHost>
<VirtualHost *:9000>
        ServerAdmin webmaster@localhost
        DocumentRoot /var/www/html/hunter2
</VirtualHost>
Notice the different port numbers 7000, 8000 and 9000. Notice also that we specified a unique DocumentRoot for each website.
three extra websites (EL)
Next we need to create three DocumentRoot directories and we have to put some really content in those directories.
student@el:~$ sudo mkdir /var/www/html/{choochoo,chessclub42,hunter2}
student@el:~$ echo 'Choo Choo model train Choo Choo' | sudo tee /var/www/html/choochoo/index.html
Choo Choo model train Choo Choo
student@el:~$ echo 'Welcome to chess club 42' | sudo tee /var/www/html/chessclub42/index.html
Welcome to chess club 42
student@el:~$ echo 'HaCkInG iS fUn At HuNtEr2' | sudo tee /var/www/html/hunter2/index.html
HaCkInG iS fUn At HuNtEr2
The directory /var/www/html is now structured as follows:
student@el:~$ tree /var/www/html/
/var/www/html/
├── chessclub42
│   └── index.html
├── choochoo
│   └── index.html
├── hunter2
│   └── index.html
└── index.html

4 directories, 4 files
Note that if the command tree is not available on your system, you can install it with sudo dnf install tree.
three extra ports (EL)
We need to enable these three ports on apache in the httpd.conf file.
student@el:~$ sudo vi /etc/httpd/conf/httpd.conf
student@el:~$ grep ^Listen /etc/httpd/conf/httpd.conf
Listen 80
Listen 7000
Listen 8000
Listen 9000
Be sure to check the syntax of the configuration file before restarting the service.
If you get a warning that the host name can not be reliably determined, you can add a ServerName directive to the main configuration file, as instructed above.
SELinux guards our ports
If we try to restart our server, we will notice the following error:
student@el:~$ sudo systemctl start httpd
Job for httpd.service failed because the control process exited with error code.
See "systemctl status httpd.service" and "journalctl -xeu httpd.service" for details.
This is due to SELinux only allowing the apache process to use specific ports that are reserved for web traffic (80 and 443 in particular).
student@el:~$ sudo semanage port -l | grep ^http_port_t
http_port_t tcp 80, 81, 443, 488, 8008, 8009, 8443, 9000
http_port_t udp 80, 443
Remark that port 9000 is already configured to be used by Apache. We only need to add ports 7000 and 8000 to the list of allowed ports.
student@el:~$ sudo semanage port -m -t http_port_t -p tcp 7000
student@el:~$ sudo semanage port -m -t http_port_t -p tcp 8000
student@el:~$ sudo semanage port -l | grep ^http_port_t
http_port_t tcp 8000, 7000, 80, 81, 443, 488, 8008, 8009, 8443, 9000
http_port_t udp 80, 443
student@el:~$ sudo systemctl start httpd
testing the three websites (EL)
You can check the status of the service with systemctl status httpd and you should see that it is running. Additionaly, you can check the ports that are being listened to with ss -tln:
student@el:~$ ss -tln
State Recv-Q Send-Q Local Address:Port Peer Address:Port
LISTEN 0 128 0.0.0.0:22 0.0.0.0:*
LISTEN 0 4096 *:9090 *:*
LISTEN 0 511 *:9000 *:*
LISTEN 0 511 *:7000 *:*
LISTEN 0 128 [::]:22 [::]:*
LISTEN 0 511 *:80 *:*
LISTEN 0 511 *:8000 *:*
To be sure that httpd (an not another process) is listening on ports 7000, 8000 and 9000, add option -p to the command and precede it with sudo to see the process name and PID. The output is too verbose to show it here.
Testing the three new websites on their respective ports:
student@el:~$ curl http://localhost:7000/
Choo Choo model train Choo Choo
student@el:~$ curl http://localhost:8000/
Welcome to chess club 42
student@el:~$ curl http://localhost:9000/
HaCkInG iS fUn At HuNtEr2
firewall rules
If we attempt to access the site from another machine however, we will not be able to view the website yet. On Enterprise Linux, the firewall is enabled by default and it will block incoming connections.
$ curl http://192.168.56.10/
curl: (7) Failed to connect to 192.168.56.10 port 80 after 0 ms: Could not connect to server
On recent versions of Enterprise Linux, the firewall is managed by firewalld. You can check the status of the firewall with systemctl status firewalld and you can list the current rules with firewall-cmd --list-all. After a default installation, the firewall rules usually look approximately like this:
student@el:~$ sudo firewall-cmd --list-all
public (default, active)
target: default
ingress-priority: 0
egress-priority: 0
icmp-block-inversion: no
interfaces: enp0s3 enp0s8
sources:
services: cockpit dhcpv6-client ssh
ports:
protocols:
forward: yes
masquerade: no
forward-ports:
source-ports:
icmp-blocks:
rich rules:
Services cockpit, dhcpv6-client and ssh are allowed, but no rules for other services, nor ports are defined. Let's add rules for the default HTTP port 80 and the three extra ports 7000, 8000 and 9000.
student@el:~$ sudo firewall-cmd --add-service=http
success
student@el:~$ sudo firewall-cmd --add-service=http --permanent
success
student@el:~$ sudo firewall-cmd --add-port=7000/tcp --permanent
success
student@el:~$ sudo firewall-cmd --add-port=8000/tcp --permanent
success
student@el:~$ sudo firewall-cmd --add-port=9000/tcp --permanent
success
student@el:~$ sudo firewall-cmd --reload
Verify the changes with firewall-cmd --list-all:
student@el:~$ sudo firewall-cmd --list-all | grep ' services\| ports'
services: cockpit dhcpv6-client http ssh
ports: 7000/tcp 8000/tcp 9000/tcp
Check from another machine if you can access the websites now:
named virtual hosts on Enterprise Linux
For an external customer, having to access a website through a port number is not very user friendly. It is much better to have a website accessible by name, e.g. mysite.example.com instead of www.example.com:8000. This is possible with named virtual hosts.
The chess club and the model train club would prefer to have their website accessible by name.
We continue work on the same server that has three websites on three ports. We need to make sure those websites are accesible using the names choochoo.local, chessclub42.local and hunter2.local.
First, we need to create three new virtualhosts.
student@el:/etc/httpd/conf.d$ sudo vi choochoo.local.conf
student@el:/etc/httpd/conf.d$ sudo cp choochoo.local.conf chessclub42.local.conf
student@el:/etc/httpd/conf.d$ sudo cp choochoo.local.conf hunter2.local.conf
student@el:/etc/httpd/conf.d$ sudo vi chessclub42.
student@el:/etc/httpd/conf.d$ sudo vi chessclub42.local.conf
student@el:/etc/httpd/conf.d$ sudo vi hunter2.local.conf
student@el:/etc/httpd/conf.d$ cat *local.conf
<VirtualHost chessclub42.local:80>
ServerAdmin webmaster@localhost
ServerName chessclub42.local
DocumentRoot /var/www/html/chessclub42
</VirtualHost>
<VirtualHost choochoo.local:80>
ServerAdmin webmaster@localhost
ServerName choochoo.local
DocumentRoot /var/www/html/choochoo
</VirtualHost>
<VirtualHost hunter2.local:80>
ServerAdmin webmaster@localhost
ServerName hunter2.local
DocumentRoot /var/www/html/hunter2
</VirtualHost>
Notice that they all listen on port 80 and have an extra ServerName directive. Also, you have to replace the * in <VirtualHost *:80> with the name of the virtual host, e.g. <VirtualHost choochoo.local:80>. If you don't do this, the VirtualHost setting will mask the default website. When you try to access the default website, you will get the content of the first virtual host instead.
name resolution (EL)
In order for a client to access a website by name, the name must be resolved to an ip-address. This is usually done with DNS. For this demo it is also possible to quickly add the three names to the /etc/hosts file.
In this example, we will first check our ip address and then add the three names to /etc/hosts. If you want to reproduce the example, be sure to replace the ip address with your own!
student@el:~$ ip -br a
lo UNKNOWN 127.0.0.1/8 ::1/128
enp0s3 UP 10.0.2.15/24 fe80::a00:27ff:fec1:d0d8/64
enp0s8 UP 192.168.56.10/24 fe80::9289:9d6f:72a6:599d/64
student@el:~$ sudo vi /etc/hosts
student@el:~$ grep ^192 /etc/hosts
192.168.56.10 el.local choochoo.local chessclub42.local hunter2.local
You can check if the names are resolved correctly with the getent ahosts command.
student@el:~$ getent ahosts el.local
192.168.56.10 STREAM el.local
192.168.56.10 DGRAM
192.168.56.10 RAW
student@el:~$ getent ahosts choochoo.local
192.168.56.10 STREAM choochoo.local
192.168.56.10 DGRAM
192.168.56.10 RAW
student@el:~$ getent ahosts chessclub42.local
192.168.56.10 STREAM chessclub42.local
192.168.56.10 DGRAM
192.168.56.10 RAW
student@el:~$ getent ahosts hunter2.local
192.168.56.10 STREAM hunter2.local
192.168.56.10 DGRAM
192.168.56.10 RAW
Remark that you could also use ping, but actually sending packets is not necessary to verify name resolution. The nslookup command will probably not work (if it is installed at all), beause it will try to query a DNS server, which is not configured for these names.
reload and verify (EL)
After a systemctl reload httpd the websites should be available by name.
student@el:~$ sudo apachectl configtest
Syntax OK
student@el:~$ sudo systemctl reload httpd
student@el:~$ curl http://choochoo.local/
Choo Choo model train Choo Choo
student@el:~$ curl http://chessclub42.local/
Welcome to chess club 42
student@el:~$ curl http://hunter2.local/
HaCkInG iS fUn At HuNtEr2
password protected website on Enterprise Linux
You can secure files and directories in your website with a .htaccess file that refers to a .htpasswd file. The htpasswd command can create a .htpasswd file that contains a userid and an (encrypted) password.
This example creates a user and password for the hacker named cliff and uses the -c flag to create the .htpasswd file.
student@el:~$ sudo htpasswd -c /var/www/.htpasswd cliff
New password:
Re-type new password:
Adding password for user cliff
Hacker rob also wants access, so we add a second user and password to .htpasswd (this time without the -c flag!).
student@el:~$ sudo htpasswd /var/www/.htpasswd rob
New password:
Re-type new password:
Adding password for user rob
student@el:~$ cat /var/www/.htpasswd
cliff:$apr1$M8ma6.gQ$2Ey1BlPZ5q23Jknh.sDBI/
rob:$apr1$kHjxUt9s$rpF62TvZXbAnisCv8KZ1N1
Both Cliff and Rob chose the same password (hunter2), but that is not visible in the .htpasswd file because of the different salts.
Next we need to create a .htaccess file in the DocumentRoot of the website we want to protect. An example is shown here:
student@el:~$ sudo vi /var/www/html/hunter2/.htaccess
student@el:~$ cat /var/www/html/hunter2/.htaccess
AuthUserFile /var/www/.htpasswd
AuthName "Members only!"
AuthType Basic
require valid-user
Note that we are only protecting the website of the hackerspace hunter2 that we created earlier.
And because we put this website in a subdirectory of the default website, we will need to adjust the AllowOverride parameter in the configuration. Open /etc/httpd/conf/httpd.conf in a text editor and search for the line with <Directory "/var/www/html"> directive. It will look approximately like this (the config file has a lot of comments, which are omitted here for clarity):
<Directory "/var/www/html">
    Options Indexes FollowSymLinks
    AllowOverride None
    Require all granted
</Directory>
Change the code block to the following (Replace None with AuthConfig):
<Directory "/var/www/html">
    Options Indexes FollowSymLinks
    AllowOverride AuthConfig
    Require all granted
</Directory>
Now restart the apache2 server and test that it works!
student@el:~$ sudo apachectl configtest
Syntax OK
student@el:~$ sudo systemctl reload httpd
student@el:~$ curl -i http://hunter2.local/
HTTP/1.1 401 Unauthorized
Date: Tue, 11 Aug 2026 23:06:55 GMT
Server: Apache/2.4.63 (AlmaLinux)
WWW-Authenticate: Basic realm="Members only!"
Content-Length: 381
Content-Type: text/html; charset=iso-8859-1

<!DOCTYPE HTML PUBLIC "-//IETF//DTD HTML 2.0//EN">
<html><head>
<title>401 Unauthorized</title>
</head><body>
<h1>Unauthorized</h1>
<p>This server could not verify that you
are authorized to access the document
requested.  Either you supplied the wrong
credentials (e.g., bad password), or your
browser doesn't understand how to supply
the credentials required.</p>
</body></html>
As expected, the server returns a 401 Unauthorized error. You should get the same result for url http://localhost:9000/.
You can test the authentication with the -u option of curl.
student@el:~$ curl -u cliff:hunter2 http://hunter2.local/
HaCkInG iS fUn At HuNtEr2
student@el:~$ curl -u rob:hunter2 http://hunter2.local/
HaCkInG iS fUn At HuNtEr2
If you try to access the website from a web browser, you will see a pop-up window asking for a username and password. You can enter either cliff or rob as the username, and hunter2 as the password.
The other sites should still be accessible without authentication.
student@el:~$ curl http://localhost/
<html><body><h1>It works!</h1></body></html>
student@el:~$ curl http://chessclub42.local/
Welcome to chess club 42
troubleshooting apache
Here are some guidelines to troubleshoot Apache when it does not work as expected.
service status
First of all, chech if the service is running with systemctl status, followed by the service name (apache2 on Debian or httpd on EL).
There are basically three possible states: active (running), inactive (dead) and failed. If the service is not running, you can try to start it with systemctl start or restart it with systemctl restart.
An example of a correctly running service:
student@el:~$ systemctl status httpd | head -3
● httpd.service - The Apache HTTP Server
     Loaded: loaded (/usr/lib/systemd/system/httpd.service; enabled; preset: disabled)
     Active: active (running) since Wed 2026-08-12 10:18:16 UTC; 18s ago
When the service is not running, you will see something like this:
student@el:~$ systemctl status httpd | head -3
○ httpd.service - The Apache HTTP Server
     Loaded: loaded (/usr/lib/systemd/system/httpd.service; enabled; preset: disabled)
     Active: inactive (dead) since Wed 2026-08-12 10:19:47 UTC; 3s ago
To start the service, use systemctl start <service>. Also chech whether the service is enabled to start at boot time with systemctl is-enabled <service> and enable it if necessary with systemctl enable <service>.
If the service is in a failed state, you will see something like this:
student@el:~$ systemctl status httpd | head -3
× httpd.service - The Apache HTTP Server
     Loaded: loaded (/usr/lib/systemd/system/httpd.service; enabled; preset: disabled)
     Active: failed (Result: exit-code) since Wed 2026-08-12 10:23:11 UTC; 3s ago
Trying to start the service at this point will not work, as there is probably a configuration error:
student@el:~$ sudo systemctl restart httpd
Job for httpd.service failed because the control process exited with error code.
See "systemctl status httpd.service" and "journalctl -xeu httpd.service" for details.
See below for more information on how to deal with this.
port status and firewall
If the service is running, it is also important to check if the service is listening on the correct ports. Use ss -tln to list all listening TCP ports. A typical Apache server should listen on port 80 (http) and 443 (https). If you have configured additional ports, they should also be listed. With sudo ss -tlnp you can also see the process name and PID that is listening on the port.
student@el:~$ sudo ss -tlnp
State   Recv-Q  Send-Q  Local Address:Port  Peer Address:Port Process
LISTEN  0       128           0.0.0.0:22         0.0.0.0:*     users:(("sshd",pid=1133,fd=7))
LISTEN  0       4096                *:9090             *:*     users:(("systemd",pid=1,fd=184))
LISTEN  0       511                 *:9000             *:*     users:(("httpd",pid=18115,fd=10),("httpd",pid=18114,fd=10),("httpd",pid=18113,fd=10),("httpd",pid=18111,fd=10))
LISTEN  0       511                 *:7000             *:*     users:(("httpd",pid=18115,fd=6),("httpd",pid=18114,fd=6),("httpd",pid=18113,fd=6),("httpd",pid=18111,fd=6))
LISTEN  0       128              [::]:22            [::]:*     users:(("sshd",pid=1133,fd=8))
LISTEN  0       511                 *:80               *:*     users:(("httpd",pid=18115,fd=4),("httpd",pid=18114,fd=4),("httpd",pid=18113,fd=4),("httpd",pid=18111,fd=4))
LISTEN  0       511                 *:8000             *:*     users:(("httpd",pid=18115,fd=8),("httpd",pid=18114,fd=8),("httpd",pid=18113,fd=8),("httpd",pid=18111,fd=8))
If the website is accessible locally (e.g. with curl http://localhost/), but not from another machine, the firewall is probably blocking incoming connections. Check the firewall rules with firewall-cmd --list-all (on EL) or ufw status (on Debian). If necessary, add rules to allow incoming connections on the required ports.
configuration errors
When Apache restarts, it parses the configuration files that will be loaded and an error is found, it will emit a log message telling you the name of the faulty file, the line number and an explanation of the error. For example, let's assume we forgot the / in the closing </VirtualHost> tag in the configuration file of the chess club website. When we try to restart Apache, we will see an error message like this:
student@el:~$ sudo systemctl restart httpd
Job for httpd.service failed because the control process exited with error code.
See "systemctl status httpd.service" and "journalctl -xeu httpd.service" for details.
The systemctl command does not show the error message, but we can look at the logs with journalctl. The error message suggests the options -x (add explanatory help texts to log messages), -e (jump to the end of the log) and -u (show only messages for a specific unit, in this case the Apache service). You can decide whether -x and -e are useful for you, but the -u option is essential to filter the log messages for the Apache service.
student@el:~$ sudo journalctl -eu httpd.service
Aug 12 10:33:25 el systemd[1]: Starting httpd.service - The Apache HTTP Server...
Aug 12 10:33:25 el (httpd)[18428]: httpd.service: Referenced but unset environment variable evaluates to an empty string: OPTIONS
Aug 12 10:33:25 el httpd[18428]: httpd: Syntax error on line 363 of /etc/httpd/conf/httpd.conf: Syntax error on line 1 of /etc/httpd/conf.d/chessclub42.local.conf: /etc/httpd/conf.d/chessclub42.local.conf:5: <VirtualHost> was not closed.\n/etc/httpd/conf.d/chessclub42.local.conf:1: <VirtualHost> was not closed.
Aug 12 10:33:25 el systemd[1]: httpd.service: Main process exited, code=exited, status=1/FAILURE
Aug 12 10:33:25 el systemd[1]: httpd.service: Failed with result 'exit-code'.
Aug 12 10:33:25 el systemd[1]: Failed to start httpd.service - The Apache HTTP Server.
The line with the Syntax error message tells us where the problem is located. In this case, you see the confirmation that the <VirtualHost> directive in chessclub42.local.conf was not closed.
The apachectl configtest command can also be used to check the configuration files for errors, without actually loading them. It will show the same error message as above.
student@el:~$ sudo apachectl configtest
httpd: Syntax error on line 363 of /etc/httpd/conf/httpd.conf: Syntax error on line 1 of /etc/httpd/conf.d/chessclub42.local.conf: /etc/httpd/conf.d/chessclub42.local.conf:5: <VirtualHost> was not closed.\n/etc/httpd/conf.d/chessclub42.local.conf:1: <VirtualHost> was not closed.
Let us force another error by introducing a typo in the DocumentRoot directive of the chess club website. Let's say we forgot an s in the directory name chessclub42.
The service will start, but the website will not be accessible.
student@el:~$ sudo systemctl start httpd
student@el:~$ sudo systemctl is-active httpd
active
student@el:~$ curl http://chessclub42.local/
<!DOCTYPE HTML PUBLIC "-//IETF//DTD HTML 2.0//EN">
<html><head>
<title>404 Not Found</title>
</head><body>
<h1>Not Found</h1>
<p>The requested URL was not found on this server.</p>
</body></html>
If we check the logs, we will see a warning message:
student@el:~$ sudo journalctl -eu httpd.service
Aug 12 10:44:15 el systemd[1]: Starting httpd.service - The Apache HTTP Server...
Aug 12 10:44:15 el (httpd)[18671]: httpd.service: Referenced but unset environment variable evaluates to an empty string: OPTIONS
Aug 12 10:44:15 el httpd[18671]: AH00112: Warning: DocumentRoot [/var/www/html/chesclub42] does not exist
Aug 12 10:44:15 el httpd[18671]: Server configured, listening on: port 9000, port 8000, ...
Aug 12 10:44:15 el systemd[1]: Started httpd.service - The Apache HTTP Server.
Running the apachectl configtest command before starting the service could have prevented this mistake:
student@el:~$ sudo apachectl configtest
AH00112: Warning: DocumentRoot [/var/www/html/chesclub42] does not exist
Syntax OK
As you can see, Apache will tell you exactly what is wrong.
When you are changing Apache configuration, always check the configuration with apachectl configtest before restarting the service. While you are interacting with the service, it is also useful to follow the logs in real time in another terminal window with journalctl -flu httpd.service. The -f option will show new log messages as they are generated and -l will show the the entire line (instead of truncating it if your terminal is too narrow).
log files
Apart from the system logs (that you can access with journalctl), Apache also has its own log files. The location of the log files is defined in the configuration file. On Debian, the default location is /var/log/apache2, while on EL it is /var/log/httpd. Log files are only accessible by the root user, so you will need to use sudo to read them.
An example on Debian:
student@debian:~$ sudo ls -l /var/log/apache2/
total 16
-rw-r----- 1 root adm 1099 Aug 12 10:50 access.log
-rw-r----- 1 root adm 4903 Aug 12 09:53 error.log
-rw-r----- 1 root adm 3044 Aug 12 10:51 other_vhosts_access.log
student@debian:~$ sudo tail -5 /var/log/apache2/access.log
::1 - - [12/Aug/2026:09:51:44 +0000] "GET / HTTP/1.1" 200 10958 "-" "curl/8.14.1"
::1 - - [12/Aug/2026:09:53:42 +0000] "GET / HTTP/1.1" 200 10958 "-" "curl/8.14.1"
::1 - - [12/Aug/2026:09:55:57 +0000] "HEAD / HTTP/1.1" 200 255 "-" "curl/8.14.1"
::1 - - [12/Aug/2026:10:09:19 +0000] "GET / HTTP/1.1" 200 10958 "-" "curl/8.14.1"
127.0.0.1 - - [12/Aug/2026:10:50:48 +0000] "GET / HTTP/1.1" 200 10958 "-" "curl/8.14.1"
student@debian:~$ sudo tail -5 /var/log/apache2/error.log
[Wed Aug 12 09:51:36.845893 2026] [mpm_event:notice] [pid 5625:tid 5625] AH00489: Apache/2.4.68 (Debian) configured -- resuming normal operations
[Wed Aug 12 09:51:36.845925 2026] [core:notice] [pid 5625:tid 5625] AH00094: Command line: '/usr/sbin/apache2'
[Wed Aug 12 09:53:33.687854 2026] [mpm_event:notice] [pid 5625:tid 5625] AH00492: caught SIGWINCH, shutting down gracefully
[Wed Aug 12 09:53:33.737933 2026] [mpm_event:notice] [pid 5712:tid 5712] AH00489: Apache/2.4.68 (Debian) configured -- resuming normal operations
[Wed Aug 12 09:53:33.737968 2026] [core:notice] [pid 5712:tid 5712] AH00094: Command line: '/usr/sbin/apache2'
student@debian:~$ sudo tail -5 /var/log/apache2/other_vhosts_access.log
hunter2.local:80 192.168.56.13 - rob [12/Aug/2026:09:56:47 +0000] "GET / HTTP/1.1" 200 253 "-" "curl/8.14.1"
choochoo.local:80 192.168.56.13 - - [12/Aug/2026:09:58:26 +0000] "GET / HTTP/1.1" 200 259 "-" "curl/8.14.1"
choochoo.local:80 192.168.56.13 - - [12/Aug/2026:10:50:54 +0000] "GET / HTTP/1.1" 200 259 "-" "curl/8.14.1"
debian.local:9000 127.0.0.1 - - [12/Aug/2026:10:51:03 +0000] "GET / HTTP/1.1" 401 712 "-" "curl/8.14.1"
debian.local:7000 127.0.0.1 - - [12/Aug/2026:10:51:08 +0000] "GET / HTTP/1.1" 200 259 "-" "curl/8.14.1"
An example on Enterprise Linux:
student@el:~$ sudo ls -l /var/log/httpd
total 16
-rw-r--r--. 1 root root 3191 Aug 12 10:46 access_log
-rw-r--r--. 1 root root 9446 Aug 12 10:44 error_log
student@el:~$ sudo tail -5 /var/log/httpd/access_log
192.168.56.10 - - [12/Aug/2026:10:56:55 +0000] "GET / HTTP/1.1" 200 32 "-" "curl/8.12.1"
127.0.0.1 - - [12/Aug/2026:10:57:02 +0000] "GET / HTTP/1.1" 401 381 "-" "curl/8.12.1"
::1 - - [12/Aug/2026:10:57:11 +0000] "GET /test.php HTTP/1.1" 404 196 "-" "curl/8.12.1"
::1 - - [12/Aug/2026:10:57:20 +0000] "GET / HTTP/1.1" 200 25 "-" "curl/8.12.1"
::1 - - [12/Aug/2026:10:57:24 +0000] "GET / HTTP/1.1" 200 32 "-" "curl/8.12.1"
student@el:~$ sudo tail -5 /var/log/httpd/error_log
AH00112: Warning: DocumentRoot [/var/www/html/chesclub42] does not exist
[Wed Aug 12 10:44:15.943234 2026] [lbmethod_heartbeat:notice] [pid 18671:tid 18671] AH02282: No slotmem from mod_heartmonitor
[Wed Aug 12 10:44:15.943581 2026] [systemd:notice] [pid 18671:tid 18671] SELinux policy enabled; httpd running as context system_u:system_r:httpd_t:s0
[Wed Aug 12 10:44:15.945728 2026] [mpm_event:notice] [pid 18671:tid 18671] AH00489: Apache/2.4.63 (AlmaLinux) configured -- resuming normal operations
[Wed Aug 12 10:44:15.945745 2026] [core:notice] [pid 18671:tid 18671] AH00094: Command line: '/usr/sbin/httpd -D FOREGROUND'
Following the log files in real time can also be done with tail -f. Press Ctrl+C to stop following the log file.
virtual hosts example
Below is a sample virtual host configuration. This virtual hosts overrules the default Apache ErrorDocument directive.
<VirtualHost 83.217.76.245:80>
ServerName cobbaut.be
ServerAlias www.cobbaut.be
DocumentRoot /home/paul/public_html
ErrorLog /home/paul/logs/error_log
CustomLog /home/paul/logs/access_log common
ScriptAlias /cgi-bin/ /home/paul/cgi-bin/
<Directory /home/paul/public_html>
    Options Indexes IncludesNOEXEC FollowSymLinks
    allow from all
</Directory>
ErrorDocument 404 http://www.cobbaut.be/cobbaut.php
</VirtualHost>
aliases and redirects
Apache supports aliases for directories, like this example shows.
Similarly, content can be redirected to another website or web server.
more on .htaccess
You can do much more with .htaccess. One example is to use .htaccess to prevent people from certain domains to access your website. Like in this case, where a number of referer spammers are blocked from the website.
paul@lounge:~/cobbaut.be$ cat .htaccess
# Options +FollowSymlinks
RewriteEngine On
RewriteCond %{HTTP_REFERER} ^http://(www\.)?buy-adipex.fw.nu.*$ [OR]
RewriteCond %{HTTP_REFERER} ^http://(www\.)?buy-levitra.asso.ws.*$ [NC,OR]
RewriteCond %{HTTP_REFERER} ^http://(www\.)?buy-tramadol.fw.nu.*$ [NC,OR]
RewriteCond %{HTTP_REFERER} ^http://(www\.)?buy-viagra.lookin.at.*$ [NC,OR]
...
RewriteCond %{HTTP_REFERER} ^http://(www\.)?www.healthinsurancehelp.net.*$ [NC]
RewriteRule .* - [F,L]
self signed certificate
Nowadays, it is no longer acceptable to run a website over plain HTTP. Production websites should always use HTTPS so traffic between the client and the server is encrypted. HTTPS is built on the concept of asymmetric encryption, which uses a public and a private key. Additionaly, the identity of the server is verified with a certificate, which is basically a digital signature of the public key by a trusted third party (the certificate authority).
For a production website, the procedure is approximately as follows:
- Generate a private key and a certificate signing request (CSR) on the server.
- Send the CSR to a certificate authority (CA) for signing.
- The CA will verify the identity of the server and return a signed certificate.
- Install the signed certificate on the server and configure the web server to use it.
For step 2, it is a necessary condition that the host name of the web server is publicly resolvable by DNS. In a test scenario like our lab setup, this is not possible. In this case, we can sign the certificate ourselves (i.e. a self-signed certificate). The disadvantage of a self-signed certificate is that the client cannot verify the identity of the server, so the browser will warn the user that the certificate is not trusted. For a production website, this is not acceptable, but for a test website, there is no way around this limitation.
self signed cert on Debian
Below is a very quick guide on setting up Apache2 on Debian with a self-signed certificate.
Chances are the necessary packages are already installed. In the following example, openssl was already installed, but it is upgraded to the latest version.
student@debian:~$ sudo apt install openssl
Upgrading:
  libssl3t64  openssl  openssl-provider-legacy

Summary:
  Upgrading: 3, Installing: 0, Removing: 0, Not Upgrading: 84
  Download size: 4,263 kB
  Space needed: 39.9 kB / 58.7 GB available

Continue? [Y/n] y
[... output omitted ...]
The place to store private keys and certificates is the directory /etc/ssl. The subdirectory certs is used for certificates (both of our own server and of known CAs), while the subdirectory private is used for private keys. Here are the contents of /etc/ssl on a Debian system. Note the permissions of the subdirectories!
student@debian:~$ sudo ls -l /etc/ssl
[sudo] password for student:
total 36
drwxr-xr-x 2 root root     16384 Aug 12 08:55 certs
-rw-r--r-- 1 root root     12411 Sep 26  2025 openssl.cnf
drwx--x--- 2 root ssl-cert  4096 Aug 12 08:55 private
During installation, a self-signed certificate is created for the default website. The certificate is stored in /etc/ssl/certs/ssl-cert-snakeoil.pem and the private key in /etc/ssl/private/ssl-cert-snakeoil.key. The snakeoil certificate is valid for 365 days. We are going to replace these with our own.
We use openssl to create a private key and self signed certificate that is valid for 999 days.
student@debian:~$ sudo openssl req -new -x509 -days 999 -nodes -out /etc/ssl/certs/debian.local.pem -keyout /etc/ssl/private/debian.local.key
..+...+...+...........+.........+...............+.+........+...............+...+.........+...+..................+...+....+........+.............+.................+++++++++++++++++++++++++++++++++++++++*.+++++++++++++++++++++++++++++++++++++++*......+.+......+...+...+..+.+...........+...............+.+..+.................................+.........+................+...+..+............+.+.....................+.....+.+.....+....+......+..............+.+...+.........+..+...+.......+...........+....+...+..+.+..+...............+.+.........+.....+......+.+......+.................+...+.......+...........+...............+......+...................+.....+.+...........+..........+...+..+...+.........+.......+...+......+.....+....+...+..+.+..+...+....+...........+.........+.+.........+..+...+......+.......+...+..............+.+..............+...+.......+......+...........+.+........+.+.....+.+........+....+...........+....+..+....+.........+...+.................+..........+...++++++
....+.+..................+...+.......................+.+...............+...+...........+++++++++++++++++++++++++++++++++++++++*....+...+..+.+.....+++++++++++++++++++++++++++++++++++++++*..+..+......++++++
-----
You are about to be asked to enter information that will be incorporated
into your certificate request.
What you are about to enter is what is called a Distinguished Name or a DN.
There are quite a few fields but you can leave some blank
For some fields there will be a default value,
If you enter '.', the field will be left blank.
-----
Country Name (2 letter code) [AU]:BE
State or Province Name (full name) [Some-State]:Flanders
Locality Name (eg, city) []:Ghent
Organization Name (eg, company) [Internet Widgits Pty Ltd]:Linux Training
Organizational Unit Name (eg, section) []:
Common Name (e.g. server FQDN or YOUR name) []:debian.local
Email Address []:webmaster@debian.local
Let's check the permissions of the files we just created.
student@debian:~$ sudo ls -l /etc/ssl/*/debian*
-rw-r--r-- 1 root root 1346 Aug 12 15:16 /etc/ssl/certs/debian.local.pem
student@debian:~$ sudo ls -l /etc/ssl/private/debian.local.key
-rw------- 1 root root 1704 Aug 12 15:15 /etc/ssl/private/debian.local.key
The private key is only readable by root (which is what we want!), while the certificate is readable by everyone. This is important, because the web server runs as a non-privileged user and needs to be able to read the certificate. On a production server, one would protect the private key with additional security measures (e.g. by encrypting it with a passphrase, or by storing it on an external hardware security module so it is not even accessible during operation). For our lab setup, this is not necessary.
Enable Apache's SSL module.
student@debian:~$ sudo a2enmod ssl
Considering dependency mime for ssl:
Module mime already enabled
Considering dependency socache_shmcb for ssl:
Enabling module socache_shmcb.
Enabling module ssl.
See /usr/share/doc/apache2/README.Debian.gz on how to configure SSL and create self-signed certificates.
To activate the new configuration, you need to run:
  systemctl restart apache2
There is already a default SSL virtual host configuration file that we can modify to use our own certificate and private key. At this time, the automatically generated "snakeoil" certificate is used.
student@debian:~$ grep '^[^#]*SSLCertificate' /etc/apache2/sites-available/default-ssl.conf
        SSLCertificateFile      /etc/ssl/certs/ssl-cert-snakeoil.pem
        SSLCertificateKeyFile   /etc/ssl/private/ssl-cert-snakeoil.key
Change these lines to point to our own certificate and private key, and then enable the site. Don't forget to check the syntax!
student@debian:~$ grep '^[^#]*SSLCertificate' /etc/apache2/sites-available/default-ssl.conf
        SSLCertificateFile      /etc/ssl/certs/debian.local.pem
        SSLCertificateKeyFile   /etc/ssl/private/debian.local.key
student@debian:~$ sudo a2ensite default-ssl.conf
Enabling site default-ssl.
To activate the new configuration, you need to run:
  systemctl reload apache2
student@debian:~$ sudo apachectl configtest
Syntax OK
Restart the Apache service to apply the changes and test the changes. The output of the ss command should now also include port 443 (the default port for HTTPS).
student@debian:~$ sudo systemctl restart apache2
student@debian:~$ ss -tln | grep 443
LISTEN 0      511                *:443             *:*
The curl command will also test the validity of the website's certificate. Since we are using a self-signed certificate, the test will fail. The -k option (or --insecure) tells curl to ignore the certificate validation.
student@debian:~$ curl -I https://localhost/
curl: (60) SSL certificate problem: self-signed certificate
More details here: https://curl.se/docs/sslcerts.html

curl failed to verify the legitimacy of the server and therefore could not
establish a secure connection to it. To learn more about this situation and
how to fix it, please visit the webpage mentioned above.
student@debian:~$ curl -I --insecure https://localhost/
HTTP/1.1 200 OK
Date: Wed, 12 Aug 2026 15:34:09 GMT
Server: Apache/2.4.68 (Debian)
Last-Modified: Wed, 12 Aug 2026 08:55:03 GMT
ETag: "29cf-658d5be3d1757"
Accept-Ranges: bytes
Content-Length: 10703
Vary: Accept-Encoding
Content-Type: text/html
We should also implement HTTPS support for our customer websites. As an example, we will show how to modify the configuration of the "choochoo.local" site to support HTTPS. You can use the same procedure for the other two websites. To protect our customers, we will redirect all HTTP traffic to HTTPS. This is done with the Redirect directive in the virtual host configuration for port 80.
Edit the configuration file for the choochoos website choochoos.local.conf and change it to the following:
<VirtualHost choochoo.local:80>
        ServerAdmin webmaster@localhost
        ServerName choochoo.local
        Redirect permanent / https://choochoo.local/
</VirtualHost>
<VirtualHost choochoo.local:443>
        ServerAdmin webmaster@localhost
        ServerName choochoo.local
        DocumentRoot /var/www/choochoo
        SSLEngine On
        SSLCertificateFile /etc/ssl/certs/debian.local.pem
        SSLCertificateKeyFile /etc/ssl/private/debian.local.key
</VirtualHost>
Test the configuration, restart Apache and test.
student@debian:~$ sudo nano /etc/apache2/sites-available/choochoo.local.conf
student@debian:~$ sudo apachectl configtest
Syntax OK
student@debian:~$ sudo systemctl restart apache2
student@debian:~$ curl http://choochoo.local/
<!DOCTYPE HTML PUBLIC "-//W3C//DTD HTML 4.01//EN" "http://www.w3.org/TR/html4/strict.dtd">
<html><head>
<title>301 Moved Permanently</title>
</head><body>
<h1>Moved Permanently</h1>
<p>The document has moved <a href="https://choochoo.local/">here</a>.</p>
<hr>
<address>Apache/2.4.68 (Debian) Server at choochoo.local Port 80</address>
</body></html>
The curl command shows that the HTTP request is redirected, but it does not follow the redirect. You can add the -L option to follow the redirect and -k to ignore the certificate validation. In the example below, we also added -i to show the HTTP headers of the response, which also shows how the redirect is handled.
student@debian:~$ curl -iLk http://choochoo.local/
HTTP/1.1 301 Moved Permanently
Date: Wed, 12 Aug 2026 15:55:51 GMT
Server: Apache/2.4.68 (Debian)
Location: https://choochoo.local/
Content-Length: 351
Content-Type: text/html; charset=iso-8859-1

HTTP/1.1 200 OK
Date: Wed, 12 Aug 2026 15:55:51 GMT
Server: Apache/2.4.68 (Debian)
Last-Modified: Wed, 12 Aug 2026 09:13:11 GMT
ETag: "20-658d5ff198597"
Accept-Ranges: bytes
Content-Length: 32
Content-Type: text/html

Choo Choo model train Choo Choo
self signed cert on Enterprise Linux
Below is a very quick guide on setting up Apache2 on Enterprise Linux with a self-signed certificate.
Chances are the necessary packages are already installed. In the following example, openssl was already installed, but it is upgraded to the latest version. We also need the mod_ssl package to enable SSL support in Apache. On Debian, this module is included in the base package, but not activated by default. On Enterprise Linux, it is a separate package.
student@el:~$ sudo dnf install openssl mod_ssl
Last metadata expiration check: 0:18:16 ago on Wed 12 Aug 2026 04:09:10 PM UTC.
Package openssl-1:3.5.1-3.el10.alma.1.x86_64 is already installed.
Dependencies resolved.
=====================================================================================
 Package                 Architecture   Version                   Repository    Size
=====================================================================================
Installing:
 mod_ssl                 x86_64         1:2.4.63-13.el10_2.5      appstream    108 k
Upgrading:
 openssl                 x86_64         1:3.5.5-6.el10_2.alma.1   baseos       1.2 M
 openssl-fips-provider   x86_64         1:3.5.5-6.el10_2.alma.1   baseos       812 k
 openssl-libs            x86_64         1:3.5.5-6.el10_2.alma.1   baseos       2.2 M

Transaction Summary
=====================================================================================
Install  1 Package
Upgrade  3 Packages

Total download size: 4.3 M
Is this ok [y/N]: y
Downloading Packages:
[... output omitted ...]

Upgraded:
  openssl-1:3.5.5-6.el10_2.alma.1.x86_64              openssl-fips-provider-1:3.5.5-6.el10_2.alma.1.x86_64
  openssl-libs-1:3.5.5-6.el10_2.alma.1.x86_64
Installed:
  mod_ssl-1:2.4.63-13.el10_2.5.x86_64

Complete!
After this, you can immediately restart httpd to enable SSL support. In /etc/httpd/conf.d/, a new configuration file, ssl.conf, has been added. It points to a self-signed certificate and private key that will be generated on server startup. These are stored in /etc/pki/tls/certs/localhost.crt and /etc/pki/tls/private/localhost.key, respectively. We will replace these below with our own self-signed certificate and private key.
After restart, the output of the ss command should now also include port 443 (the default port for HTTPS).
student@el:~$ sudo systemctl restart httpd
student@el:~$ ss -tln | grep 443
LISTEN 0      511                *:443             *:*
student@el:~$ ls -l /etc/pki/tls/*/localhost*
-rw-r--r--. 1 root root 3712 Aug 12 16:33 /etc/pki/tls/certs/localhost.crt
-rw-------. 1 root root 1700 Aug 12 16:33 /etc/pki/tls/private/localhost.key
Note the permissions of the files!
The curl command will also test the validity of the website's certificate. Since we are using a self-signed certificate, the test will fail. The -k option (or --insecure) tells curl to ignore the certificate validation.
student@el:~$ curl https://localhost/
curl: (60) SSL certificate problem: self-signed certificate in certificate chain
More details here: https://curl.se/docs/sslcerts.html

curl failed to verify the legitimacy of the server and therefore could not
establish a secure connection to it. To learn more about this situation and
how to fix it, please visit the webpage mentioned above.
student@el:~$ curl -k https://localhost/
<html><body><h1>It works!</h1></body></html>
The place to store private keys and certificates is the directory /etc/pki/tls. The subdirectory certs is used for certificates (both of our own server and of known CAs), while the subdirectory private is used for private keys. Here are the contents of /etc/pki/tls on an AlmaLinux system.
student@el:~$ ls -l /etc/pki/tls/
total 32
lrwxrwxrwx. 1 root root    49 Oct 29  2025 cert.pem -> /etc/pki/ca-trust/extracted/pem/tls-ca-bundle.pem
drwxr-xr-x. 2 root root  8192 Jul 27 00:00 certs
-rw-r--r--. 1 root root   412 Jul 27 00:00 ct_log_list.cnf
lrwxrwxrwx. 1 root root    50 Jul 27 00:00 fips_local.cnf -> /etc/crypto-policies/back-ends/openssl_fips.config
drwxr-xr-x. 2 root root     6 Jul 27 00:00 misc
-rw-r--r--. 1 root root 12412 Jul 27 00:00 openssl.cnf
drwxr-xr-x. 2 root root     6 Jul 27 00:00 openssl.d
drwxr-xr-x. 2 root root     6 Jul 27 00:00 private
We use openssl to create a private key and self signed certificate that is valid for 999 days.
student@el:~$ sudo openssl req -new -x509 -days 999 -nodes -out /etc/pki/tls/certs/el.local.pem -keyout /etc/pki/tls/private/el.local.key
.+++++++++++++++++++++++++++++++++++++++*....+...+........+...+....+..+...+.......+...........+.........+.+.....+++++++++++++++++++++++++++++++++++++++*....+...+.+...+.................+.+.....+.........+...+.......+...+..+.........+.+......+...+......+.....+.........+...............+.+...+..+...+...+...+......+......+...+..........+...............+.....+.......+.........+...+..+.+........+.......+..+.+..............+............+.+.....+............+.+.........+...........+.+...+......+.....+................+.........+.........+...++++++
.+.....+.+.....+......+.........+.+.....+++++++++++++++++++++++++++++++++++++++*..+.+......+.....+.......+...+.........+.......................+............+.+++++++++++++++++++++++++++++++++++++++*...+.+.....+............+.+..+....+...........+...+.........+.+..+.........+................+..+.+..+....+.....++++++
-----
You are about to be asked to enter information that will be incorporated
into your certificate request.
What you are about to enter is what is called a Distinguished Name or a DN.
There are quite a few fields but you can leave some blank
For some fields there will be a default value,
If you enter '.', the field will be left blank.
-----
Country Name (2 letter code) [XX]:BE
State or Province Name (full name) []:Flanders
Locality Name (eg, city) [Default City]:Ghent
Organization Name (eg, company) [Default Company Ltd]:Linux Training
Organizational Unit Name (eg, section) []:
Common Name (eg, your name or your server's hostname) []:el.local
Email Address []:webmaster@el.local
student@el:~$ ls -l /etc/pki/tls/*/el.local*
-rw-r--r--. 1 root root 1403 Aug 12 19:28 /etc/pki/tls/certs/el.local.pem
-rw-------. 1 root root 1708 Aug 12 19:27 /etc/pki/tls/private/el.local.key
The private key is only readable by root (which is what we want!), while the certificate is readable by everyone. This is important, because the web server runs as a non-privileged user and needs to be able to read the certificate. On a production server, one would protect the private key with additional security measures (e.g. by encrypting it with a passphrase, or by storing it on an external hardware security module so it is not even accessible during operation). For our lab setup, this is not necessary.
We add the location of our new keys to the ssl.conf configuration file. Don't forget to check the syntax!
student@el:~$ sudo vim /etc/httpd/conf.d/ssl.conf
student@el:~$ grep '^[^#]*SSLCert' /etc/httpd/conf.d/ssl.conf
SSLCertificateFile /etc/pki/tls/certs/el.local.pem
SSLCertificateKeyFile /etc/pki/tls/private/el.local.key
student@el:~$ sudo apachectl configtest
Syntax OK
student@el:~$ sudo systemctl restart httpd
student@el:~$ curl -k https://localhost/
<html><body><h1>It works!</h1></body></html>
We should also implement HTTPS support for our customer websites. As an example, we will show how to modify the configuration of the "choochoo.local" site to support HTTPS. You can use the same procedure for the other two websites. To protect our customers, we will redirect all HTTP traffic to HTTPS. This is done with the Redirect directive in the virtual host configuration for port 80.
<VirtualHost choochoo.local:80>
        ServerAdmin webmaster@localhost
        ServerName choochoo.local
        Redirect permanent / https://choochoo.local/
</VirtualHost>
<VirtualHost choochoo.local:443>
        ServerAdmin webmaster@localhost
        ServerName choochoo.local
        DocumentRoot /var/www/html/choochoo
        SSLEngine on
        SSLCertificateFile /etc/pki/tls/certs/el.local.pem
        SSLCertificateKeyFile /etc/pki/tls/private/el.local.key
</VirtualHost>
Test the configuration, restart Apache and test.
student@el:$ sudo vim /etc/httpd/conf.d/choochoo.local.conf
student@el:~$ sudo apachectl configtest
Syntax OK
student@el:~$ sudo systemctl restart httpd
student@el:~$ curl http://choochoo.local/
<!DOCTYPE HTML PUBLIC "-//IETF//DTD HTML 2.0//EN">
<html><head>
<title>301 Moved Permanently</title>
</head><body>
<h1>Moved Permanently</h1>
<p>The document has moved <a href="https://choochoo.local/">here</a>.</p>
</body></html>
The curl command shows that the HTTP request is redirected, but it does not follow the redirect. You can add the -L option to follow the redirect and -k to ignore the certificate validation. In the example below, we also added -i to show the HTTP headers of the response, which also shows how the redirect is handled.
student@el:~$ curl -iLk http://choochoo.local/
HTTP/1.1 301 Moved Permanently
Date: Wed, 12 Aug 2026 19:46:39 GMT
Server: Apache/2.4.63 (AlmaLinux) OpenSSL/3.5.5
Location: https://choochoo.local/
Content-Length: 231
Content-Type: text/html; charset=iso-8859-1

HTTP/1.1 200 OK
Date: Wed, 12 Aug 2026 19:46:39 GMT
Server: Apache/2.4.63 (AlmaLinux) OpenSSL/3.5.5
Last-Modified: Tue, 11 Aug 2026 22:00:04 GMT
ETag: "20-658cc97de3981"
Accept-Ranges: bytes
Content-Length: 32
Content-Type: text/html; charset=UTF-8

Choo Choo model train Choo Choo
certificate for a production website
Remark that the procedure above will create a private key and self-signed certificate in a single step. For a production website, this is obviously not acceptable. In that case, you should generate a Certificate Signing Request (CSR) and send it to a trusted Certificate Authority (CA) for signing. The CA will verify the identity of the server and return a signed certificate. The procedure is as follows:
student@el:~$ openssl genrsa -out el.local.key
student@el:~$ openssl req -new -key el.local.key -out el.local.csr
You are about to be asked to enter information that will be incorporated
into your certificate request.
What you are about to enter is what is called a Distinguished Name or a DN.
There are quite a few fields but you can leave some blank
For some fields there will be a default value,
If you enter '.', the field will be left blank.
-----
Country Name (2 letter code) [XX]:BE
State or Province Name (full name) []:Flanders
Locality Name (eg, city) [Default City]:Ghent
Organization Name (eg, company) [Default Company Ltd]:Linux Training
Organizational Unit Name (eg, section) []:
Common Name (eg, your name or your server's hostname) []:el.local
Email Address []:webmaster@el.local

Please enter the following 'extra' attributes
to be sent with your certificate request
A challenge password []:
An optional company name []:
student@el:~$ ls -l
total 8
-rw-r--r--. 1 student student 1037 Aug 12 19:50 el.local.csr
-rw-------. 1 student student 1704 Aug 12 19:49 el.local.key
Send the .csr file to the CA for signing. The CA will return a signed certificate, which you can then install on the server. Signing a CSR with a CA is not possible in our lab setup, because the host name of the server is not publicly resolvable by DNS.
To complete the example, we will sign the CSR ourselves, resulting in another self-signed certificate.
student@el:~$ openssl x509 -req -days 999 -in el.local.csr -signkey el.local.key -out el.local.pem
Certificate request self-signature ok
subject=C=BE, ST=Flanders, L=Ghent, O=Linux Training, CN=el.local, emailAddress=webmaster@el.local
student@el:~$ ls -l
total 12
-rw-r--r--. 1 student student 1037 Aug 12 19:50 el.local.csr
-rw-------. 1 student student 1704 Aug 12 19:49 el.local.key
-rw-r--r--. 1 student student 1334 Aug 12 19:54 el.local.pem
You only need the .key and .pem files on the server. The .csr file is only needed to send to the CA for signing.
self signed cert in the browser
When you access a website with a self-signed certificate in your browser, you will get a warning that the certificate is not trusted. The screenshot below is from Firefox, but other browsers will show a similar warning. You can click on "Advanced" and then "Accept the Risk and Continue" to proceed to the website.
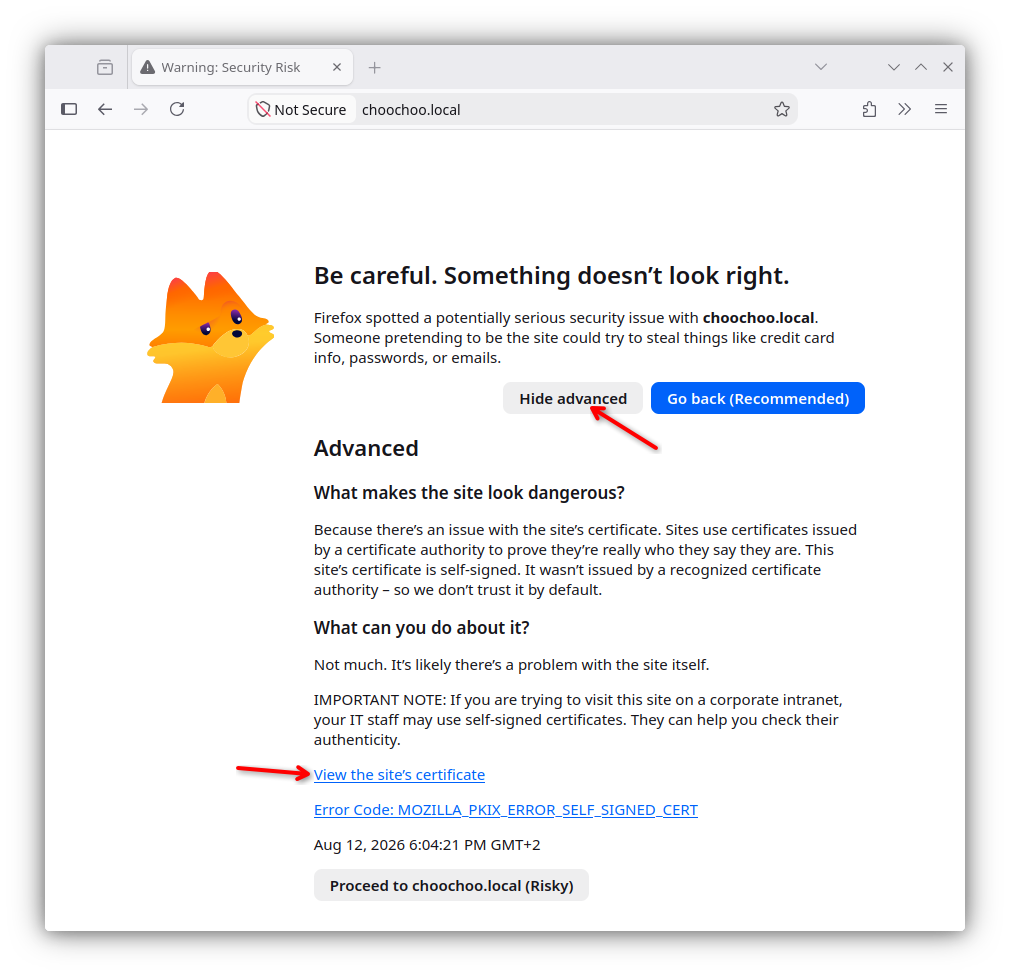
You can view the certificate by clicking the link "View site's certificate" in the warning message. The screenshot below shows the details of the self-signed certificate we created for the choochoo.local website.
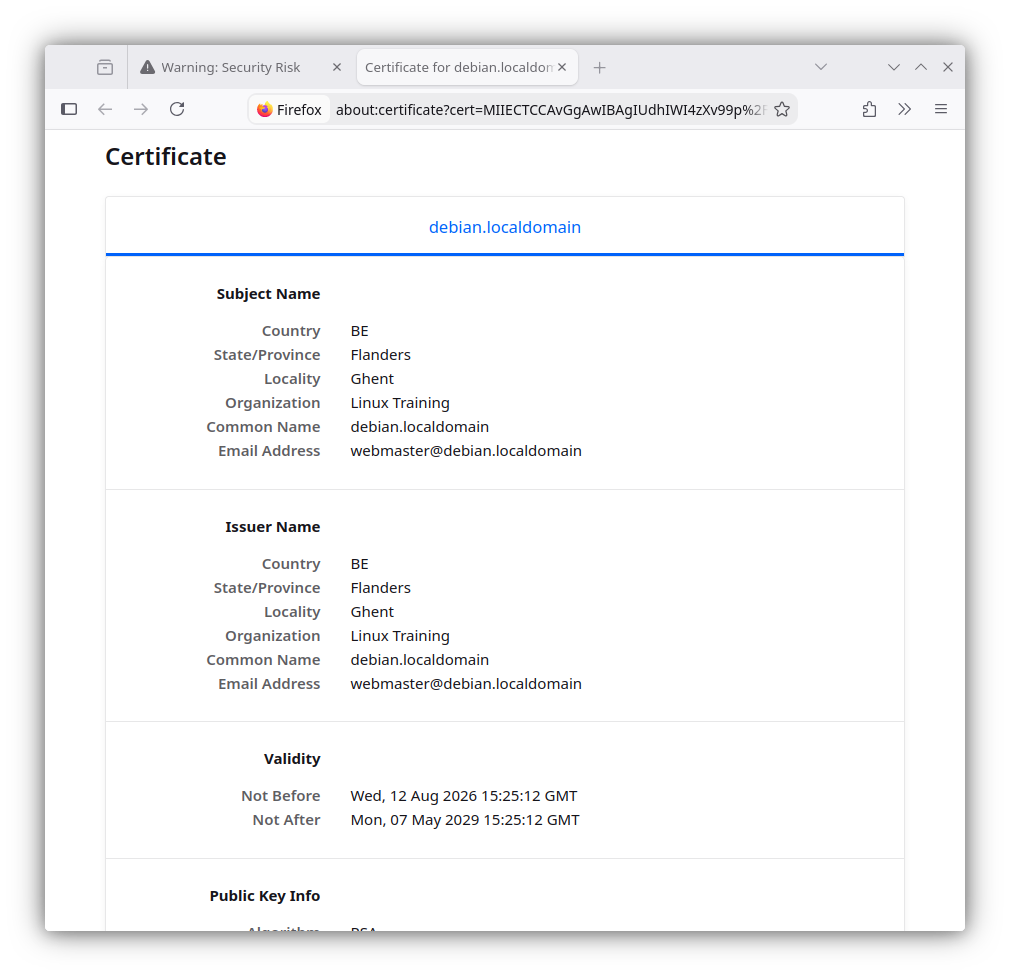
practice: apache
The following exercises can be done on a virtual machine with either a Debian-based or Enterprise Linux based distribution.
-
Install Apache and test that it works
-
Browse the Apache HTML manual and look up the directives that were used in this chapter.
-
Create three virtual hosts that listen on ports 8472, 31337 and 1201. Test that it all works.
-
Create three named virtual hosts
startrek.local,starwars.localandstargate.local, and add some content. Test that it all works. -
Create a virtual hosts that listens on another ip-address.
-
Protect one of your websites with a user/password combo.